![]() Fri Aug 27, 2010 4:09 pm
Fri Aug 27, 2010 4:09 pm
Benchmade 51 Chemical Deanodizing Tutorial
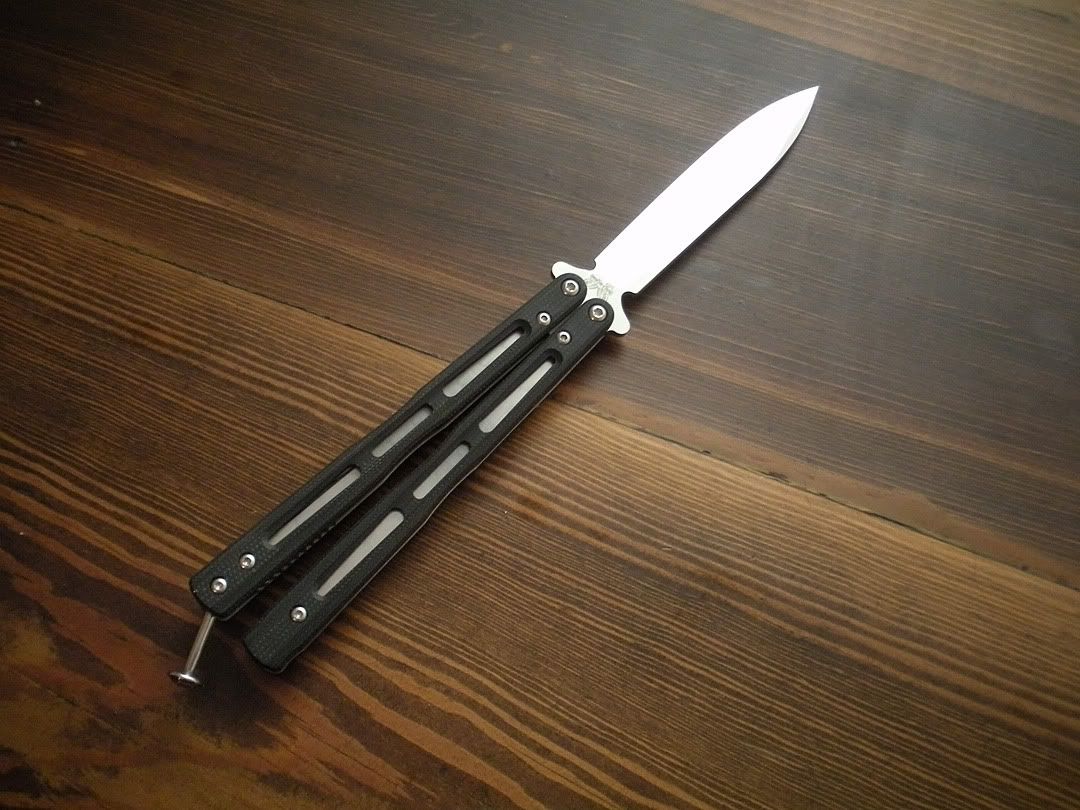
Some people like the blue anodized titanium liners in the BM 51, some people don't. I happen to be in the camp that doesn't really care for the color. Call me boring, but I prefer my knives to not have bright candy colors in general. I like a more tactical aesthetic with muted tones, blacks, greys, and raw metals.
So anyway I decided to strip the anodizing off my 51 and just go for the raw ti look (but I suppose you could also probably reanodize it to a different color after this if you were so inclined). I'd never deanodized anything before, but I figured I'd take pictures documenting my process on the off chance it turned out to be successful in the end. Lucky for me it worked like a charm! So I decided to share the step by step process in case anyone else wants to try this as well.
(btw, you can click the pictures in this post to see higher res versions if you want)
WARNING!!
This tutorial involves working with hazardous chemicals containing fairly powerful acids. It could seriously damage your skin, clothes, furniture, etc, poison you, as well as make you go blind. If you are a minor, enlist an adult to help you. Again this stuff could make you go blind so try this at your own risk!
Alright, lets get down to it.
LIST OF MATERIALS:
• Your knife (obviously)
• Torx wrench set (I used a husky set that I picked up at the local Home depot for $6)
• Pyrex container just big enough to hold your parts (I just grabbed one at a thrift store for a couple bucks because my wife didn't want me experimenting with hazardous chemicals in her lasagna dish. haha)
• A little cup or container to hold your screws and little bits so you don't lose any
• Anodizing Remover solution
• Rubber gloves
• Safety glasses or some sort of eye protection (I didn't have real safety goggles on hand, so I used a pair of WWII style flight goggles I happen to have...I'm a dork, I know.)
• Respirator mask - the little white paper ones won't do much good against chemicals....those are more suited for protecting you from dust and other airborne particles, so use one designed for fumes with full-on filters like you can find in the paint section of the hardware store (I did the stripping outside and with a bit of breeze I found I didn't need the mask, but if you are doing it inside make sure you have plenty of ventilation and you should probably wear the respirator)
• Vinegar (I don't know much about the chemistry there, but I read it has enough base that it will help to neutralize the strong acid in the anodize remover)
• Water
• Ziplock sandwich or snack baggies
• Paper towels
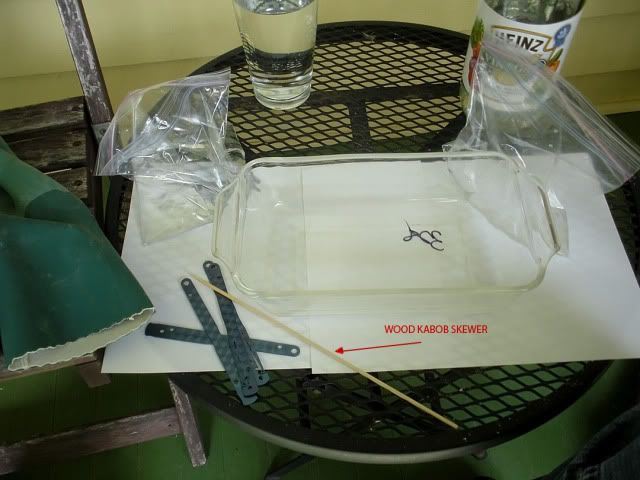
• Something to pull the ti pieces out of the solution. (You could use your gloved fingers, but in the interest of having as little contact as possible with the chemicals I used a wood kabob skewer I had in the kitchen to poke through the screw holes and fish the pieces out.)
• Loctite blue (optional) - you may want to loctite your screws when putting them back in to keep them secure.
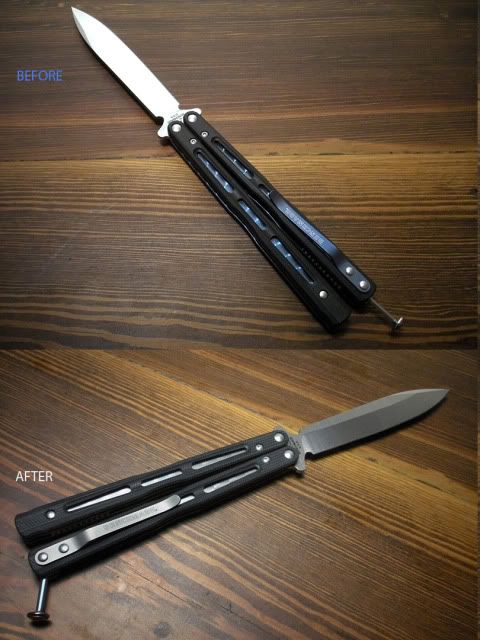
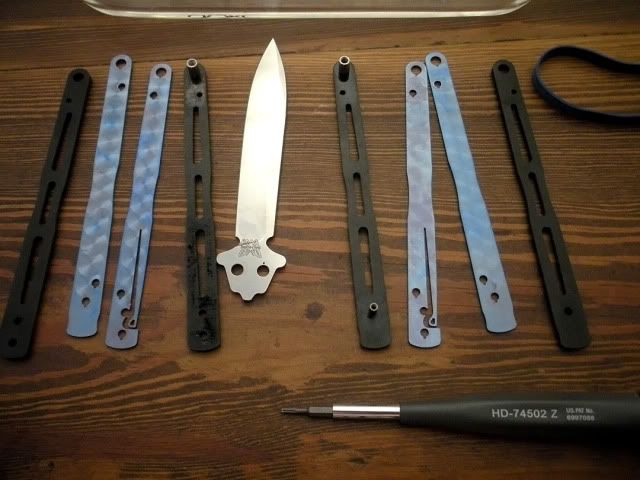
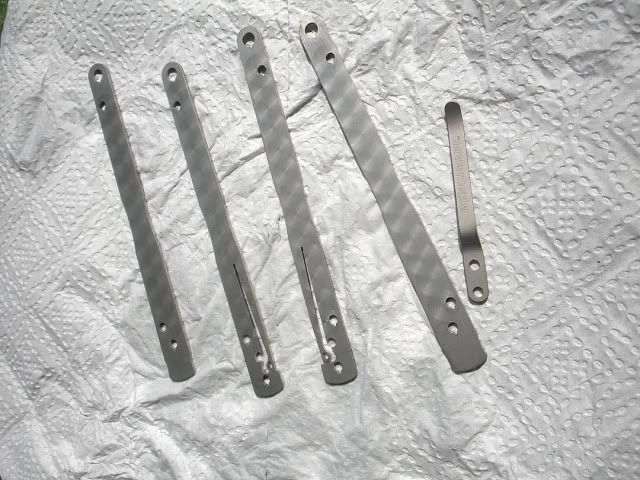
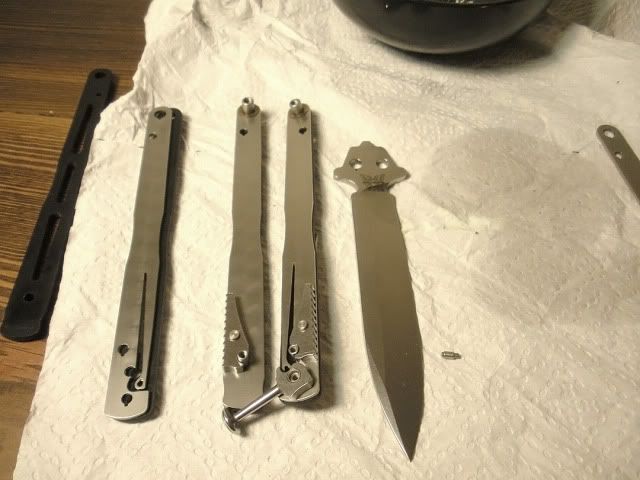
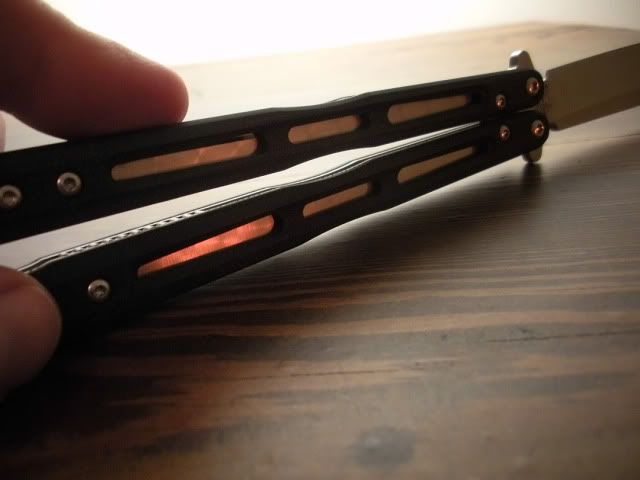
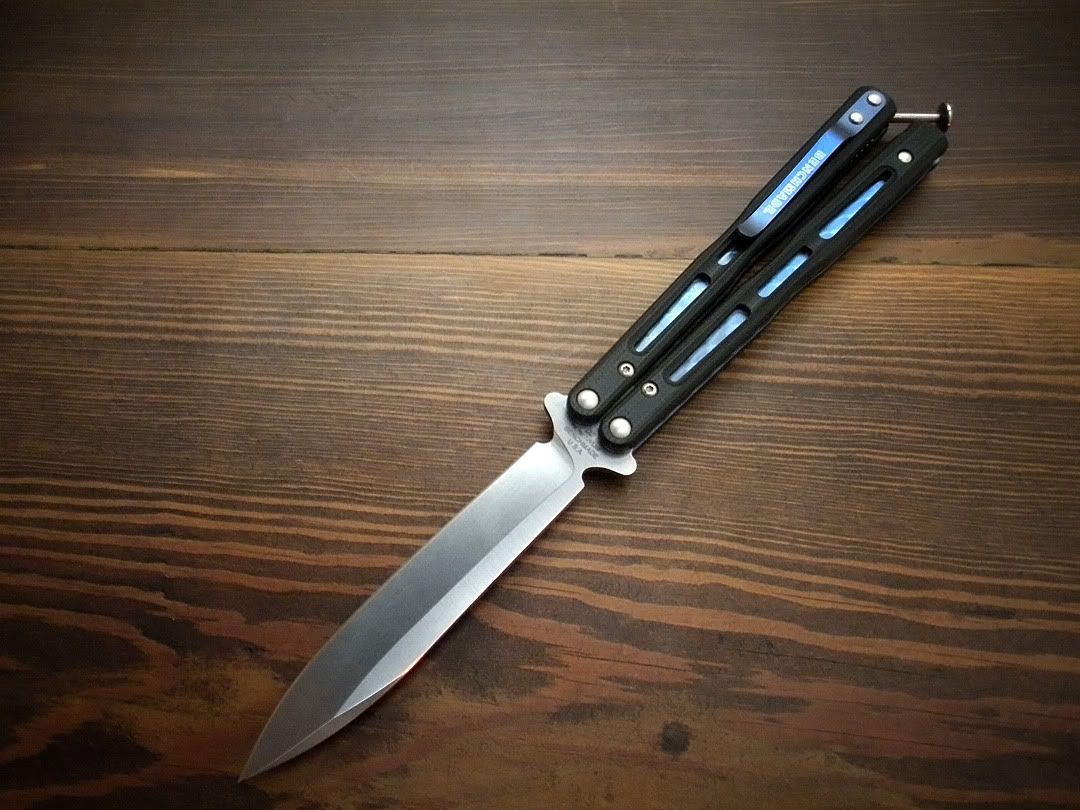
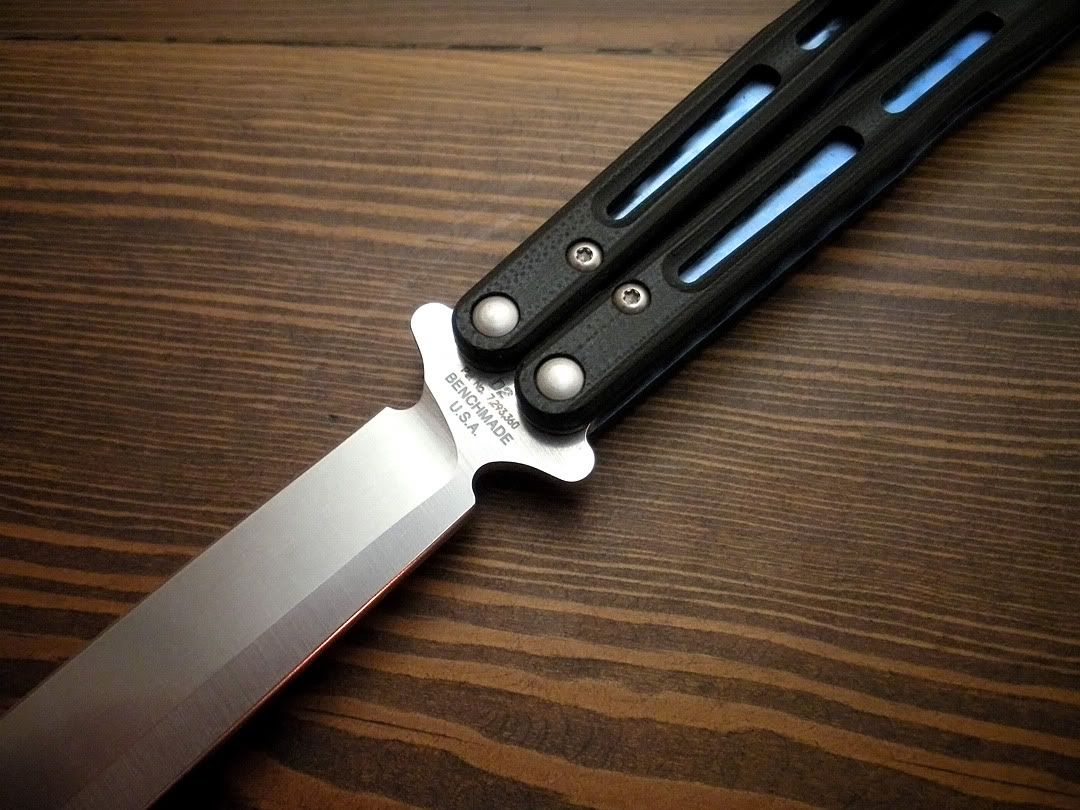
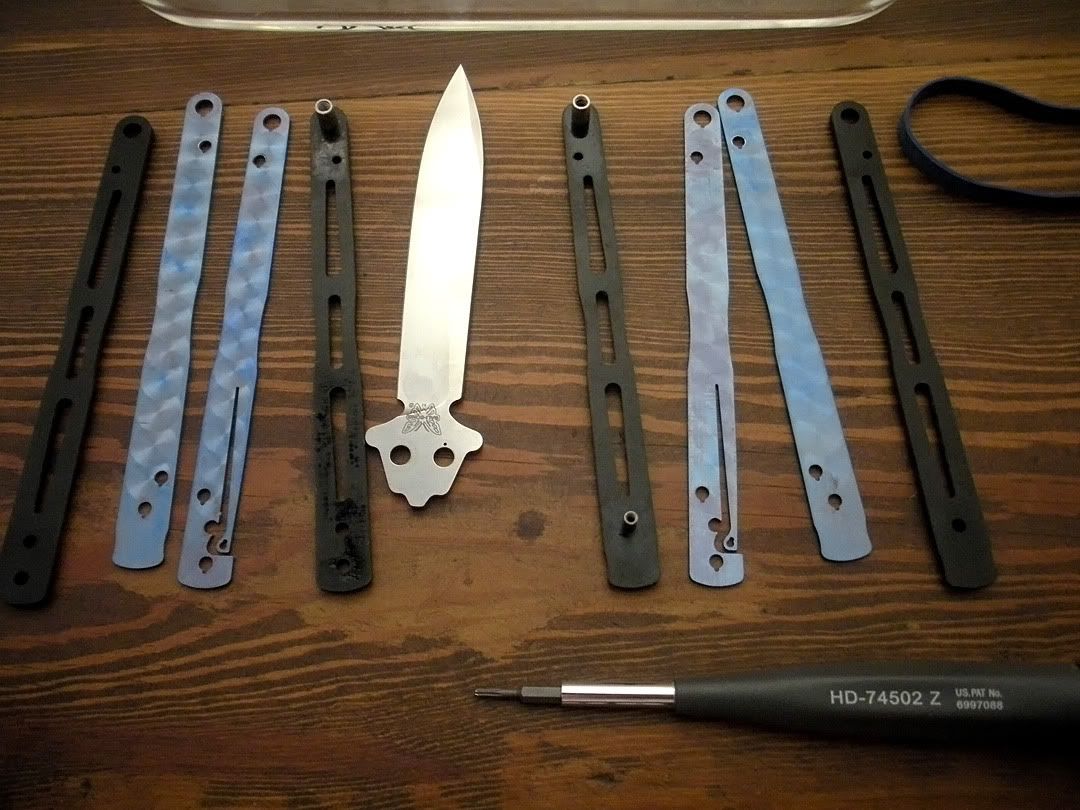
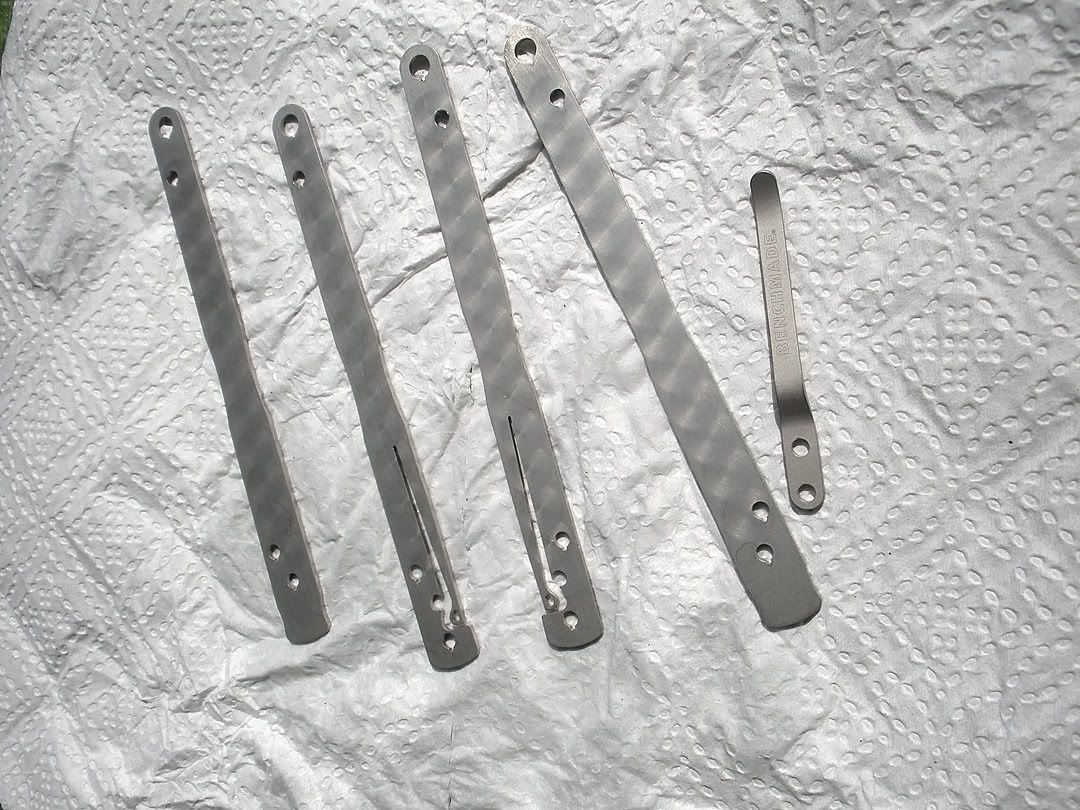
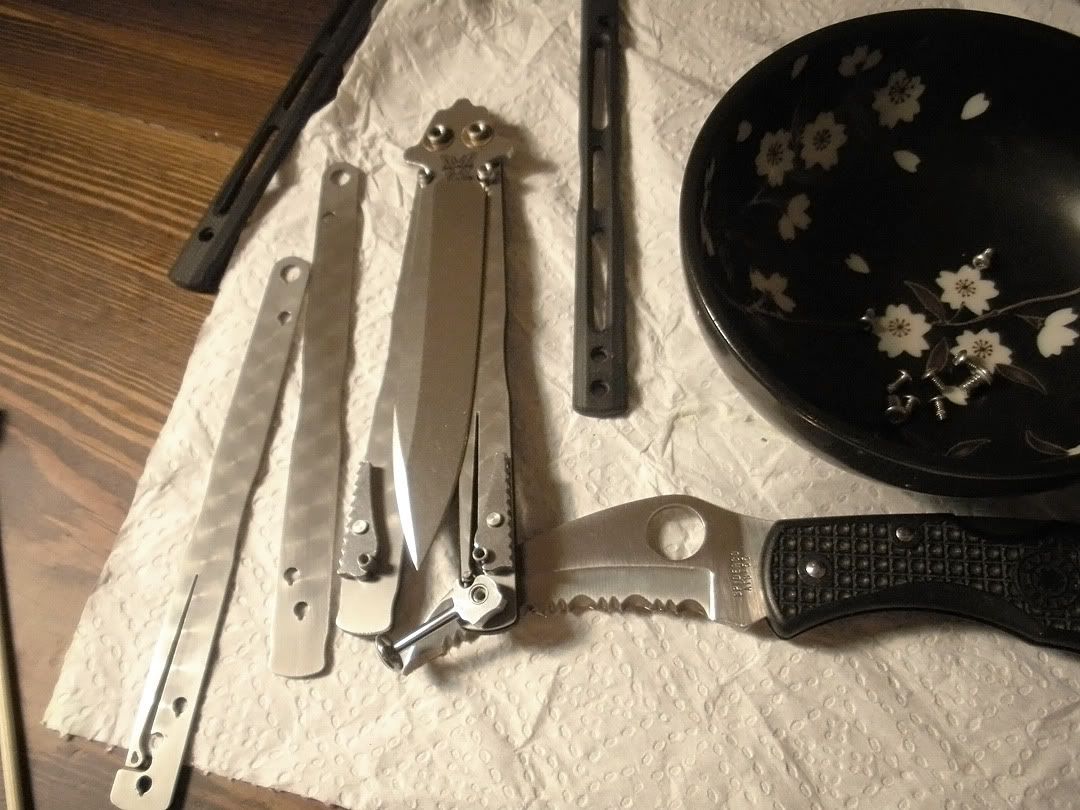
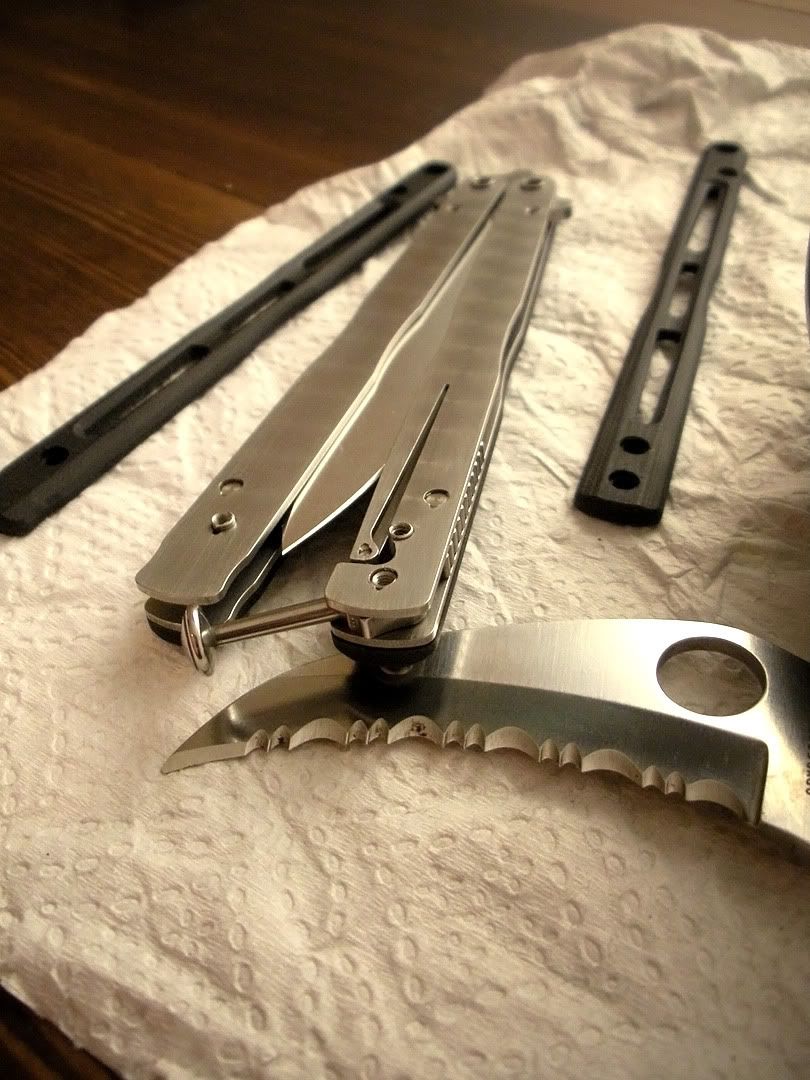
Here's some various "before" shots:


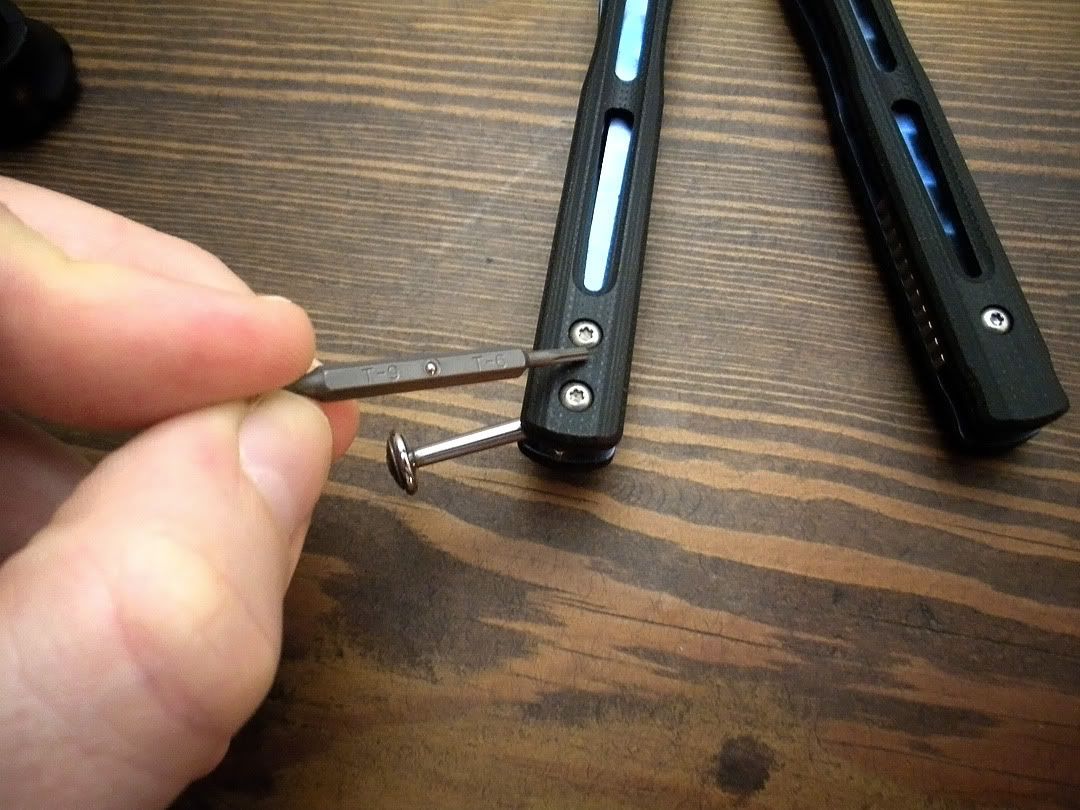
DISASSEMBLY:
First use your torx wrench to take out all the screws. The small screws are T6 size and I believe the pivots are T8. (Most of my screws came out without much of a fight, but there was one or two that gave me hell trying to get them out. A couple of the screw heads got kinda stripped in the process but they came out eventually and the heads weren't too stripped to use the torx on so it's all good.)

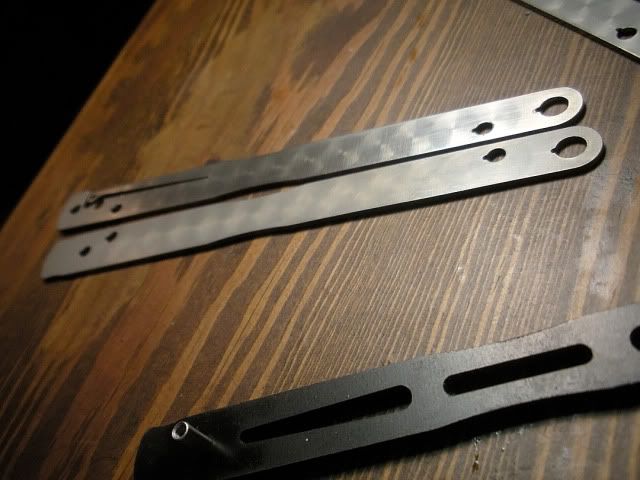
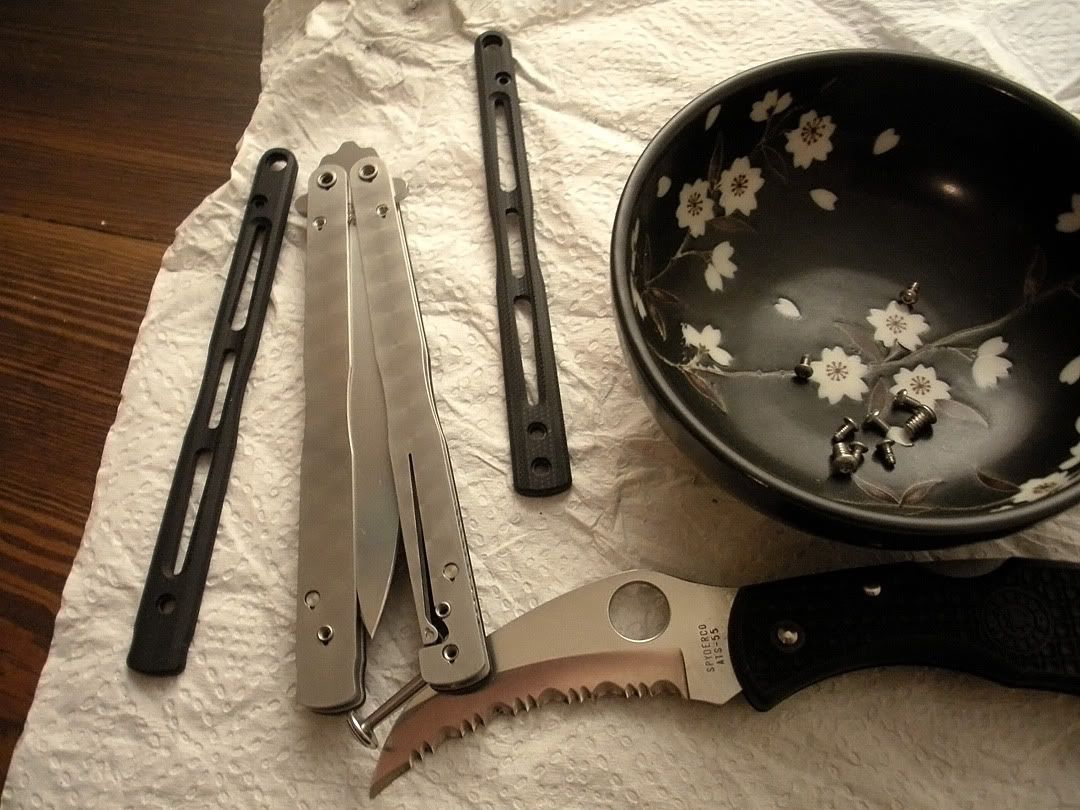
Taking it apart is fairly straight forward, but here's some shots that show the disassembly process:
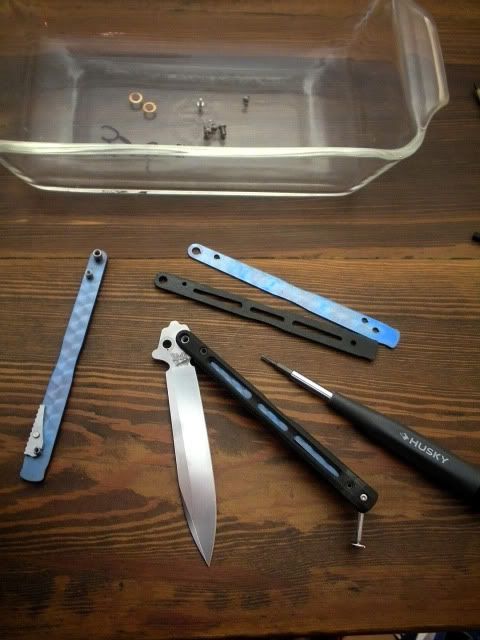
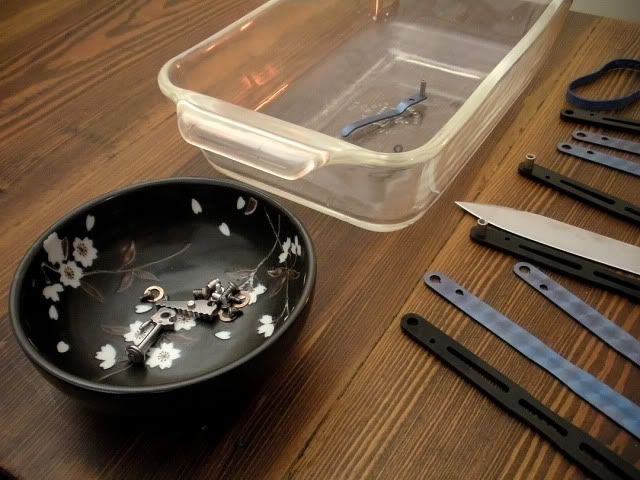
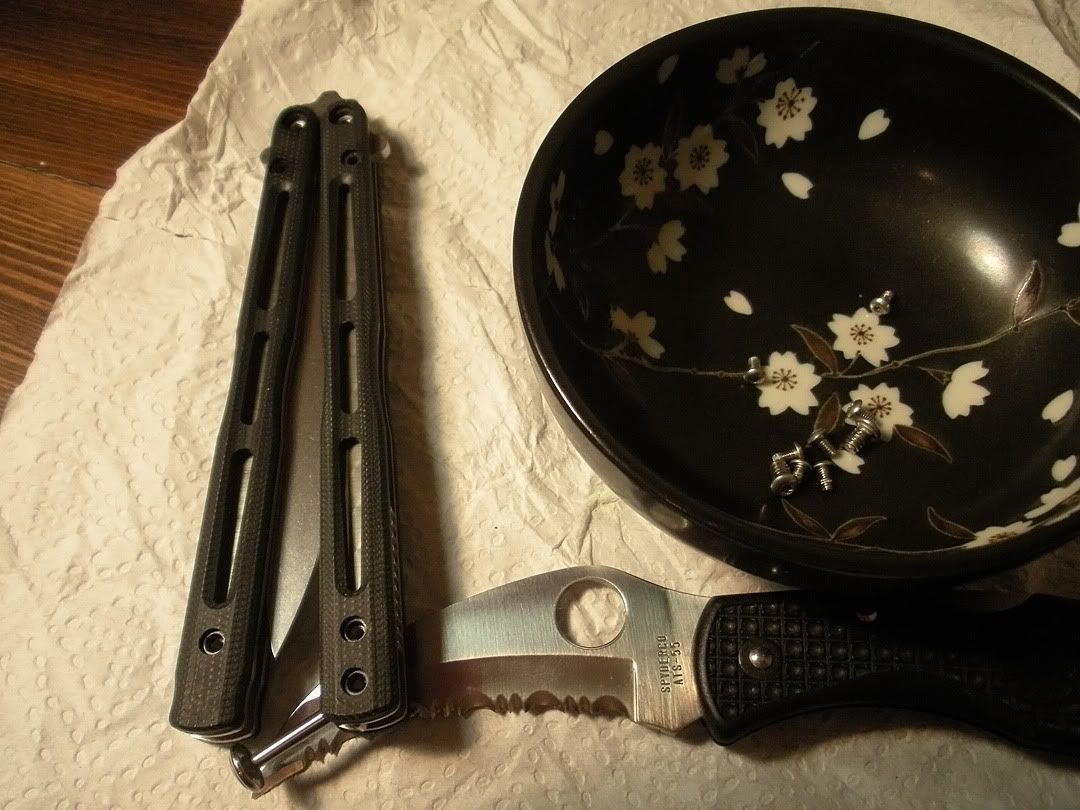
TIP - Make sure to immediately put your screws and small bits into a container or you might loose them:
REMOVING THE ANODIZING:
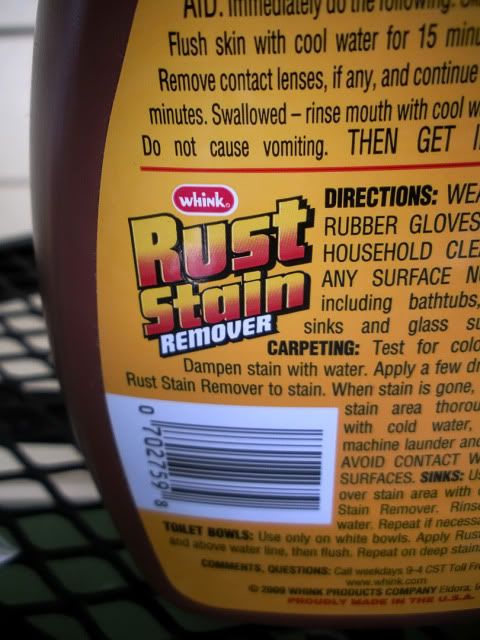
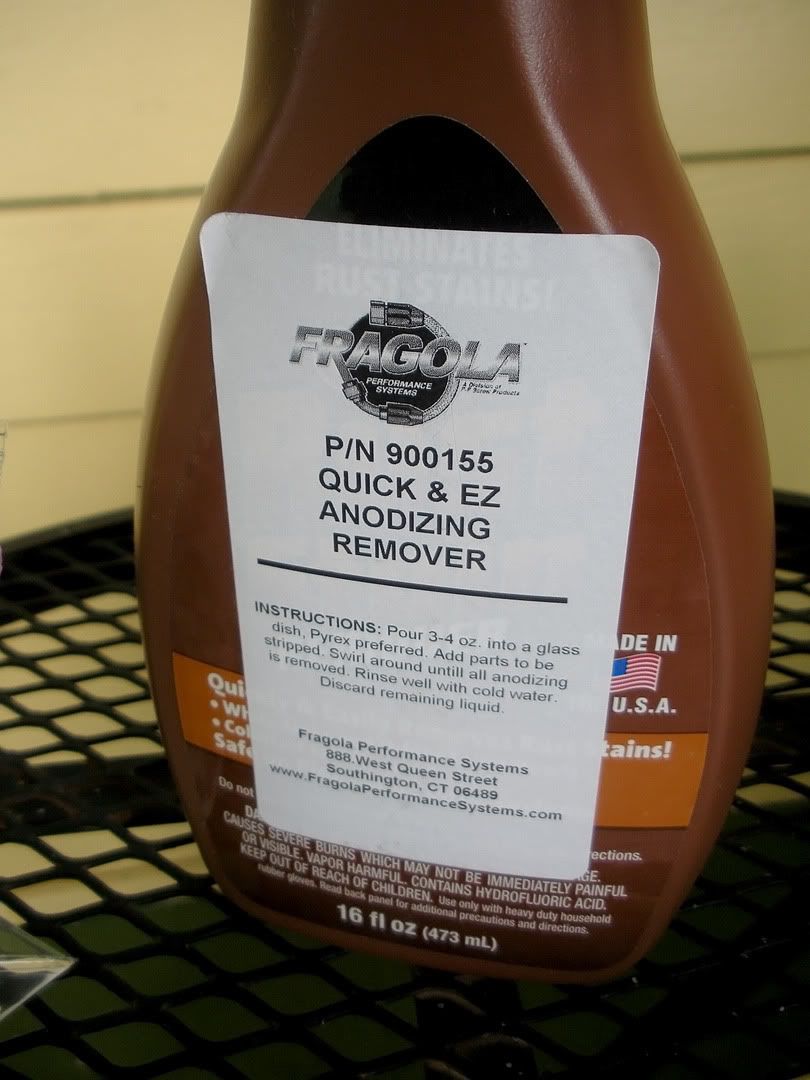
I ordered this solution called by Fragola called "Quick & EZ Anodizing Remover" from a racing supply store for $8 bucks.

After getting it in mail I noticed Fragola just slapped their label on a bottle of Whink "Rust Stain Remover." (I assume it's the same solution inside, so if you can find the rust remover somewhere you might not have to necessarily get the "Fragola" stuff.)
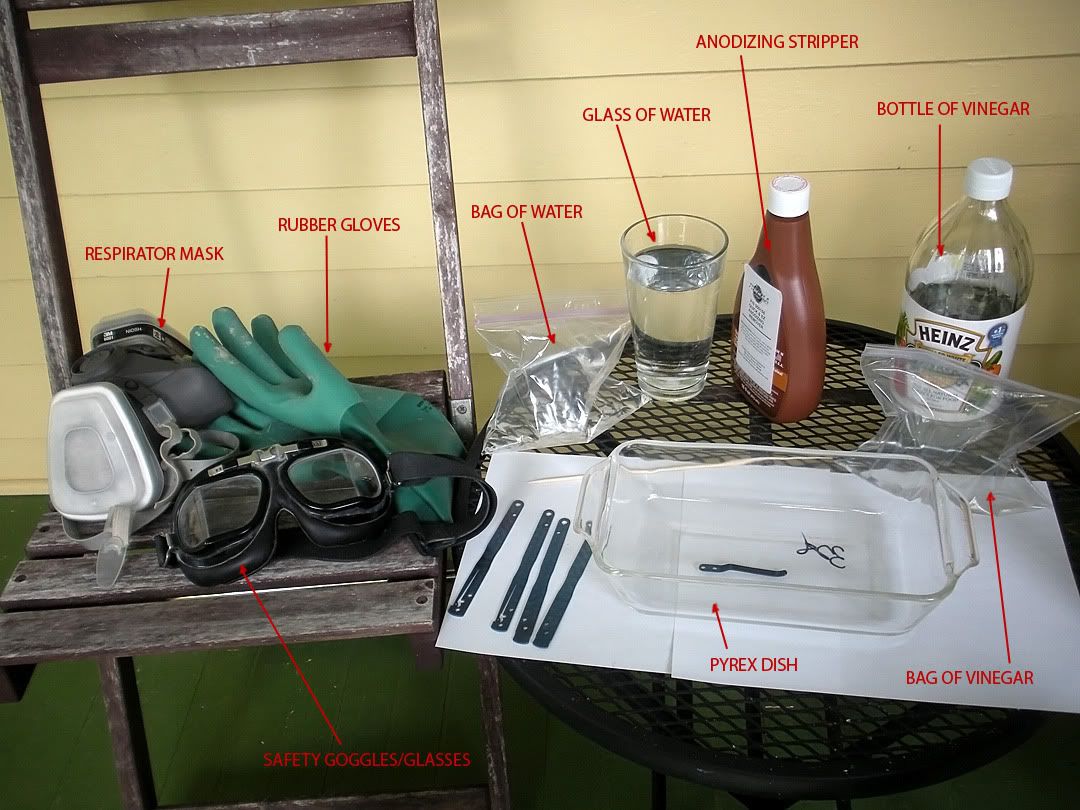
Here's a shot showing all the materials I used for the anodize stripping (make sure to have a glass of water, hose, or sink close by in case you get some chemicals on your skin or in your eye):

I used a kabob stick to fish the pieces out of the acid:
Step 1: Pour enough remover solution into the pyrex dish to completely cover the pieces once you put them in.
Step 2: Place one of the pieces in the solution and swish it around with the kabob stick for a few seconds. It will start to bubble and you should see the blue color disappear pretty quickly. It will only take few seconds...in fact it happened so fast I didn't have time to grab the camera to take a picture.
Step 3: Fish the piece out with your kabob skewer Take it out of the acid immediately as soon as the color is gone or the acid may start to eat away at the underlying titanium! (I wanted to make sure the swirl pattern etched into the liners by Benchmade remained and I didn't want to risk any pitting so I only left the pieces in for a few seconds.)
TIP - Do your pieces one at a time or it will be harder to control how long each piece is in the solution.
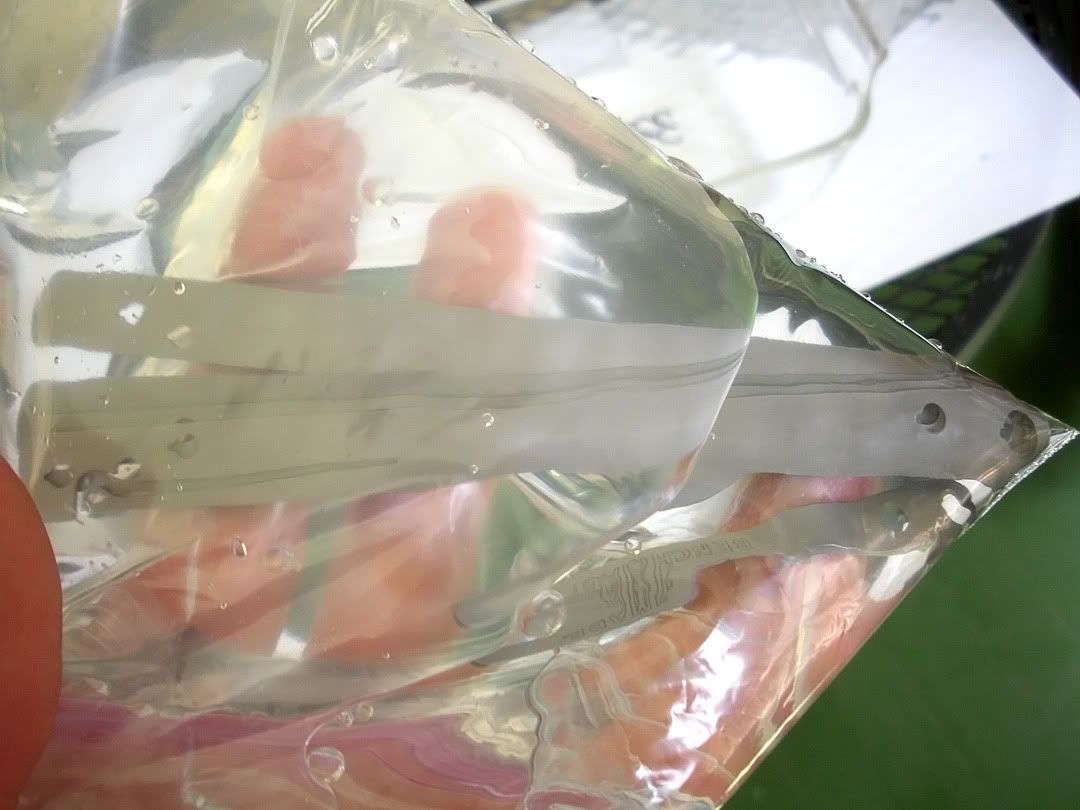
Step 4: Put the piece in the bag of vinegar and swish it around. (note: I'm not 100% sure this step is necessary, but I had read something about it helping to neutralize the stronger acid. *shrugs* Well, it didn't hurt it as far as I can tell , so I don't a reason not to do it)
Step 5: Transfer the piece over to the bag of water and swish around.

Repeat steps 1 - 5 with each piece.
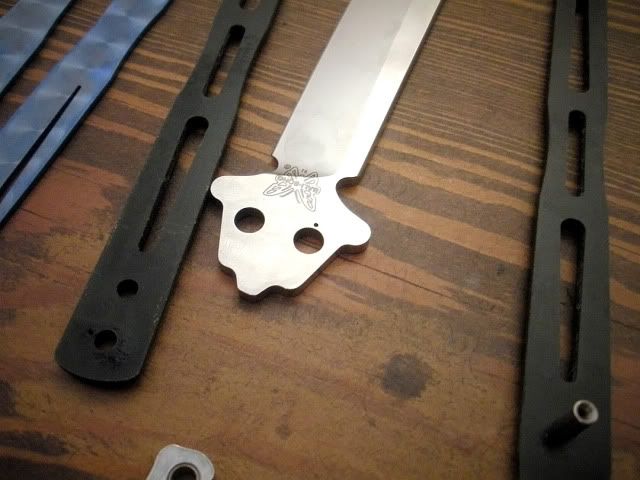
Step 6: Dry them off. (note: you can see that only the very top anodized layer was removed leaving the subtle swirl pattern on the liners and the benchmade logo on the pocket clip.)
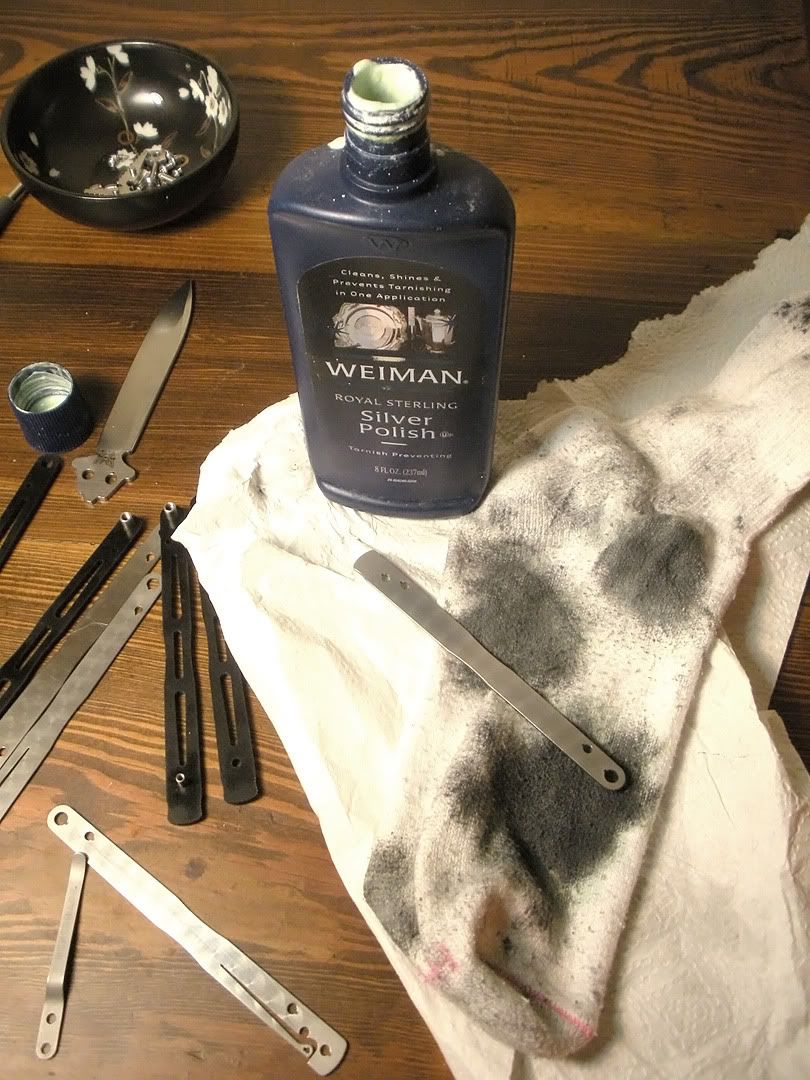
POLISHING:
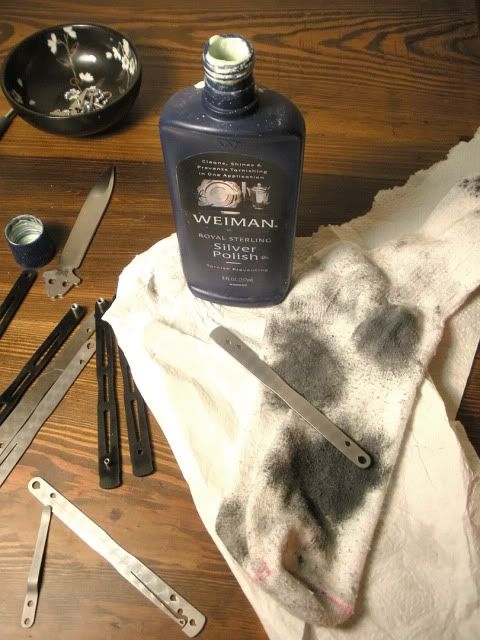
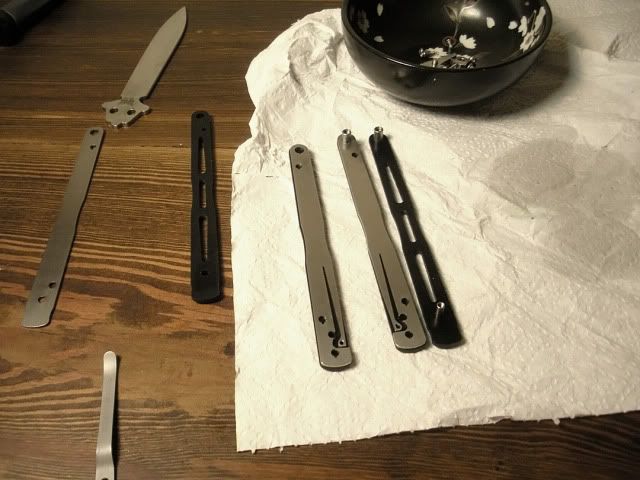
Now that the deanodizing was done I found the pieces looked kinda dull, so I decided to try to polish them up. My wife had some silver polish/tarnish protector, so I thought I'd give that a try. I'm pretty happy with the result. You can see the comparison between the dull milky matte finish they had after coming out of the stripping process and the nice polished sheen they got after polishing them a bit:
I used this silver polish and an old sock. All that black on the sock came off the titanium pieces. (There may be a better way to polish titanium, but my improvisation with the sock and silver polish seemed to work ok for me.)
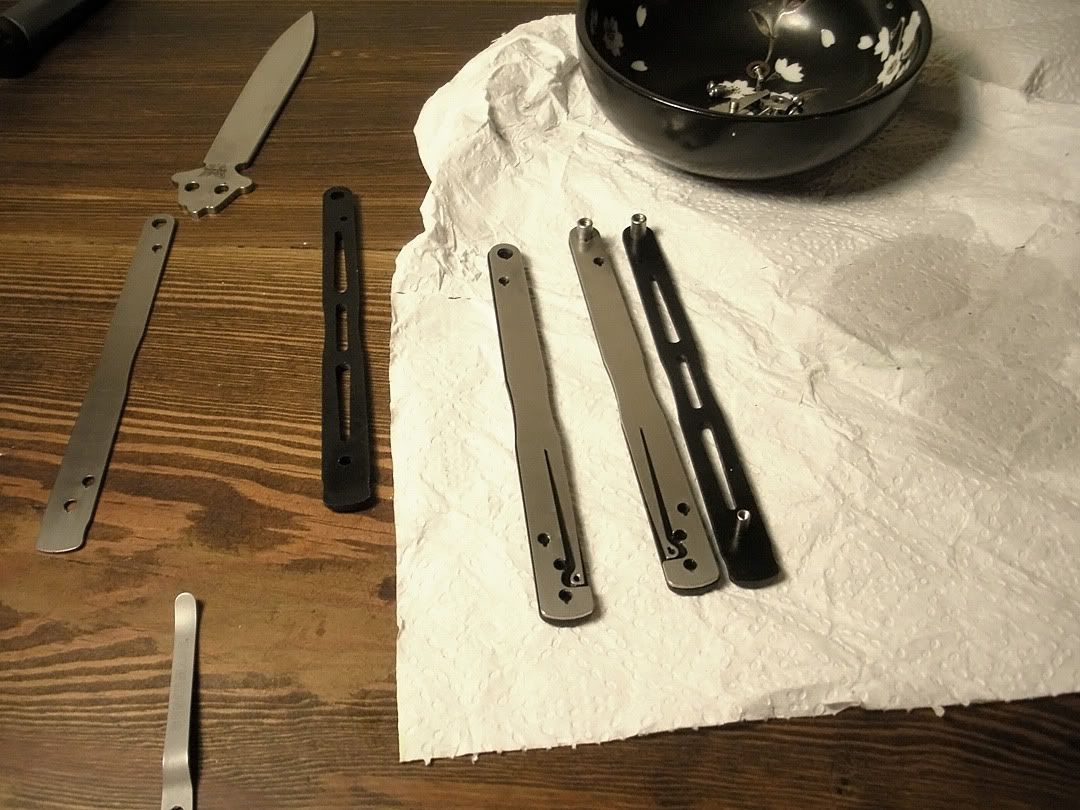
REASSEMBLY:
Again, pretty straight forward. It's just a matter of putting all the pieces together in the right order. If you can put a simple puzzle together you can do this, but here's some process pics:


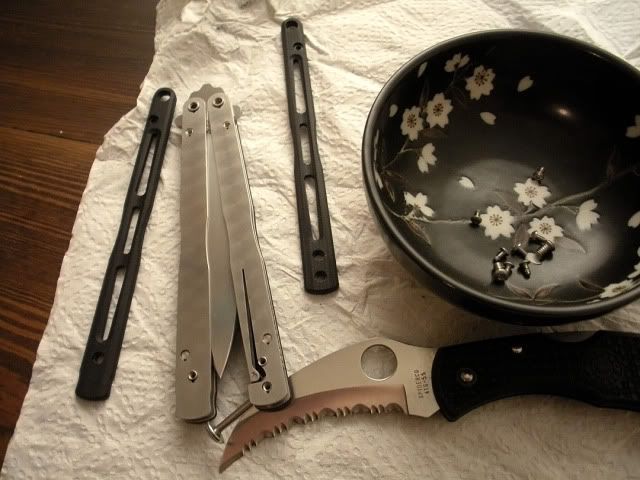
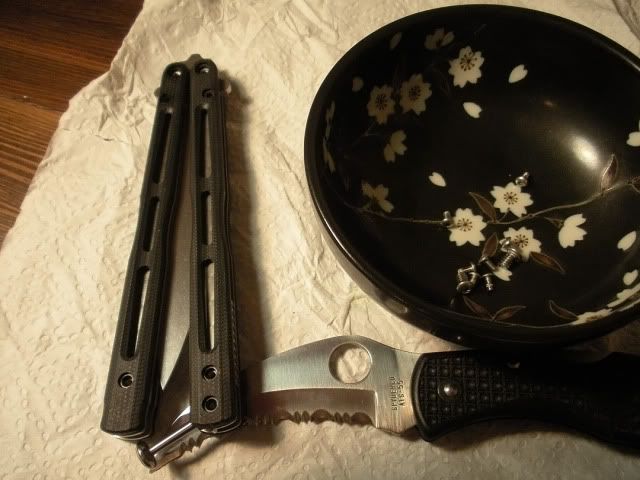
If you're wondering what the hell the spyderco is doing there, I am just using it to wedge under there to hold the screw barrels in the pocket clip while I put everything back together:

Now all the pieces are layered back together in the right order, so you can just go ahead put your screws back in. (optional: now you could put the locktite on your threads to keep the screws secure if you want, but that's up to you):
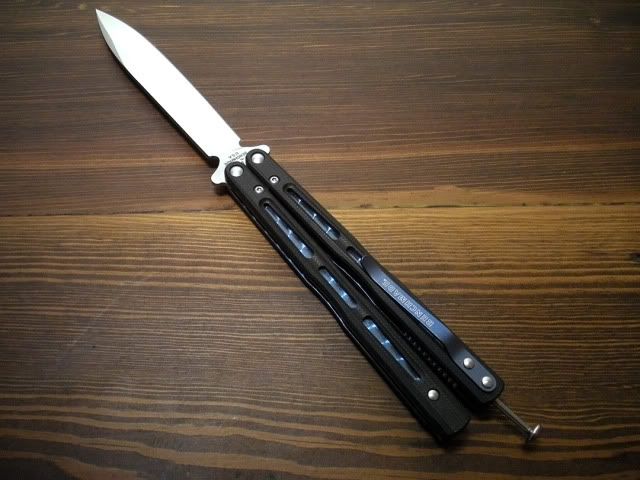
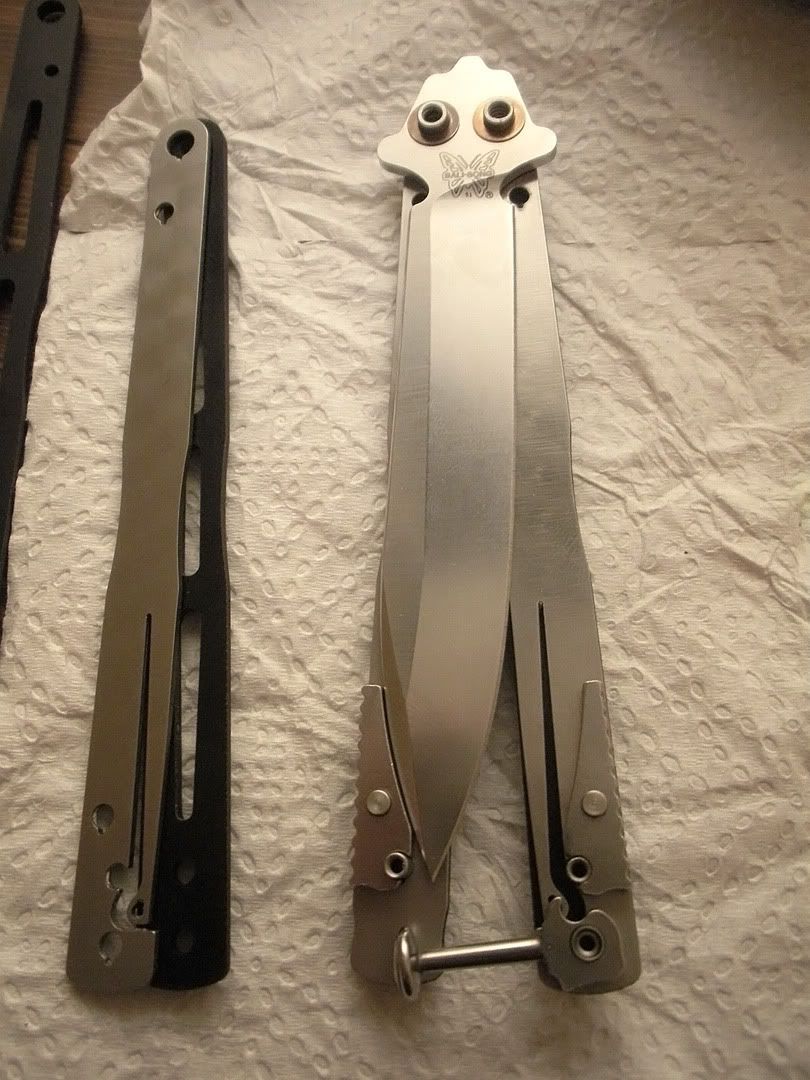
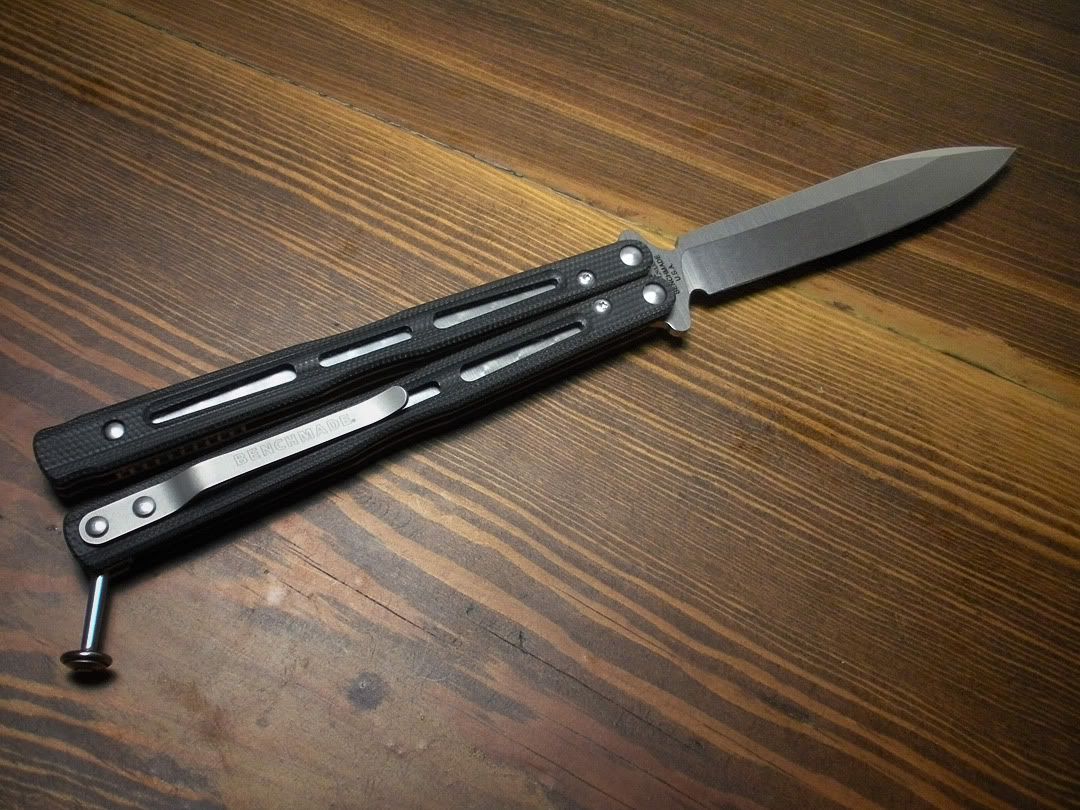
...and finally here are some "after pics" showcasing how it turned out in the end:

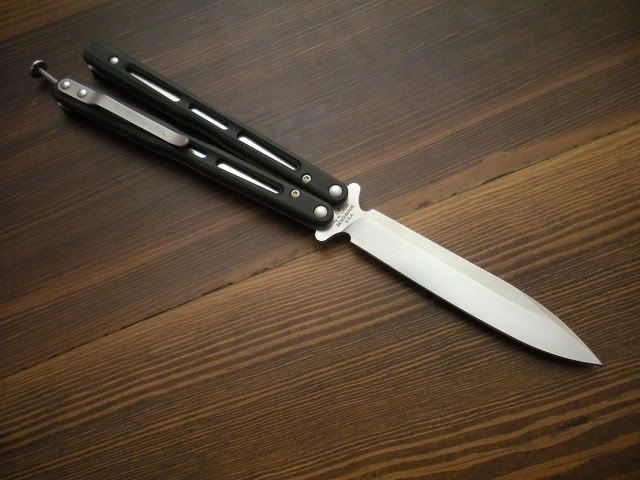

This last picture is just to show that the swirl pattern is still on the liners. The liners are not actually orange, they are just catching warm light from one of my lamps:
Well, that's all folks. Hope you found it helpfully, or at least a mildly interesting. I know the tut is kinda long and in-depth...it may make the process look more complicated than it really is, but I wanted to make it detailed. cheers!
So anyway I decided to strip the anodizing off my 51 and just go for the raw ti look (but I suppose you could also probably reanodize it to a different color after this if you were so inclined). I'd never deanodized anything before, but I figured I'd take pictures documenting my process on the off chance it turned out to be successful in the end. Lucky for me it worked like a charm! So I decided to share the step by step process in case anyone else wants to try this as well.
(btw, you can click the pictures in this post to see higher res versions if you want)

WARNING!!
This tutorial involves working with hazardous chemicals containing fairly powerful acids. It could seriously damage your skin, clothes, furniture, etc, poison you, as well as make you go blind. If you are a minor, enlist an adult to help you. Again this stuff could make you go blind so try this at your own risk!
Alright, lets get down to it.
LIST OF MATERIALS:
• Your knife (obviously)
• Torx wrench set (I used a husky set that I picked up at the local Home depot for $6)
• Pyrex container just big enough to hold your parts (I just grabbed one at a thrift store for a couple bucks because my wife didn't want me experimenting with hazardous chemicals in her lasagna dish. haha)
• A little cup or container to hold your screws and little bits so you don't lose any
• Anodizing Remover solution
• Rubber gloves
• Safety glasses or some sort of eye protection (I didn't have real safety goggles on hand, so I used a pair of WWII style flight goggles I happen to have...I'm a dork, I know.)
• Respirator mask - the little white paper ones won't do much good against chemicals....those are more suited for protecting you from dust and other airborne particles, so use one designed for fumes with full-on filters like you can find in the paint section of the hardware store (I did the stripping outside and with a bit of breeze I found I didn't need the mask, but if you are doing it inside make sure you have plenty of ventilation and you should probably wear the respirator)
• Vinegar (I don't know much about the chemistry there, but I read it has enough base that it will help to neutralize the strong acid in the anodize remover)
• Water
• Ziplock sandwich or snack baggies
• Paper towels
• Something to pull the ti pieces out of the solution. (You could use your gloved fingers, but in the interest of having as little contact as possible with the chemicals I used a wood kabob skewer I had in the kitchen to poke through the screw holes and fish the pieces out.)
• Loctite blue (optional) - you may want to loctite your screws when putting them back in to keep them secure.
Here's some various "before" shots:

DISASSEMBLY:
First use your torx wrench to take out all the screws. The small screws are T6 size and I believe the pivots are T8. (Most of my screws came out without much of a fight, but there was one or two that gave me hell trying to get them out. A couple of the screw heads got kinda stripped in the process but they came out eventually and the heads weren't too stripped to use the torx on so it's all good.)
Taking it apart is fairly straight forward, but here's some shots that show the disassembly process:


TIP - Make sure to immediately put your screws and small bits into a container or you might loose them:

REMOVING THE ANODIZING:
I ordered this solution called by Fragola called "Quick & EZ Anodizing Remover" from a racing supply store for $8 bucks.
After getting it in mail I noticed Fragola just slapped their label on a bottle of Whink "Rust Stain Remover." (I assume it's the same solution inside, so if you can find the rust remover somewhere you might not have to necessarily get the "Fragola" stuff.)

Here's a shot showing all the materials I used for the anodize stripping (make sure to have a glass of water, hose, or sink close by in case you get some chemicals on your skin or in your eye):
I used a kabob stick to fish the pieces out of the acid:

Step 1: Pour enough remover solution into the pyrex dish to completely cover the pieces once you put them in.
Step 2: Place one of the pieces in the solution and swish it around with the kabob stick for a few seconds. It will start to bubble and you should see the blue color disappear pretty quickly. It will only take few seconds...in fact it happened so fast I didn't have time to grab the camera to take a picture.
Step 3: Fish the piece out with your kabob skewer Take it out of the acid immediately as soon as the color is gone or the acid may start to eat away at the underlying titanium! (I wanted to make sure the swirl pattern etched into the liners by Benchmade remained and I didn't want to risk any pitting so I only left the pieces in for a few seconds.)
TIP - Do your pieces one at a time or it will be harder to control how long each piece is in the solution.
Step 4: Put the piece in the bag of vinegar and swish it around. (note: I'm not 100% sure this step is necessary, but I had read something about it helping to neutralize the stronger acid. *shrugs* Well, it didn't hurt it as far as I can tell , so I don't a reason not to do it)
Step 5: Transfer the piece over to the bag of water and swish around.
Repeat steps 1 - 5 with each piece.
Step 6: Dry them off. (note: you can see that only the very top anodized layer was removed leaving the subtle swirl pattern on the liners and the benchmade logo on the pocket clip.)
POLISHING:
Now that the deanodizing was done I found the pieces looked kinda dull, so I decided to try to polish them up. My wife had some silver polish/tarnish protector, so I thought I'd give that a try. I'm pretty happy with the result. You can see the comparison between the dull milky matte finish they had after coming out of the stripping process and the nice polished sheen they got after polishing them a bit:

I used this silver polish and an old sock. All that black on the sock came off the titanium pieces. (There may be a better way to polish titanium, but my improvisation with the sock and silver polish seemed to work ok for me.)
REASSEMBLY:
Again, pretty straight forward. It's just a matter of putting all the pieces together in the right order. If you can put a simple puzzle together you can do this, but here's some process pics:

If you're wondering what the hell the spyderco is doing there, I am just using it to wedge under there to hold the screw barrels in the pocket clip while I put everything back together:
Now all the pieces are layered back together in the right order, so you can just go ahead put your screws back in. (optional: now you could put the locktite on your threads to keep the screws secure if you want, but that's up to you):
...and finally here are some "after pics" showcasing how it turned out in the end:

This last picture is just to show that the swirl pattern is still on the liners. The liners are not actually orange, they are just catching warm light from one of my lamps:

Well, that's all folks. Hope you found it helpfully, or at least a mildly interesting. I know the tut is kinda long and in-depth...it may make the process look more complicated than it really is, but I wanted to make it detailed. cheers!
Last edited by Helix on Fri Aug 27, 2010 4:12 pm, edited 1 time in total.
Shaclack clack!